Tengine 官网安装相当简略,这里详细安装一次(ubuntu15 安装 tengine)
安装必要的编译环境 Tengine 安装需要使用源代码自行编译,所以安装前需要安装必要的编译工具
1
2
3
sudo apt-get update sudo apt-get install g++ apt-get install libgd-dev
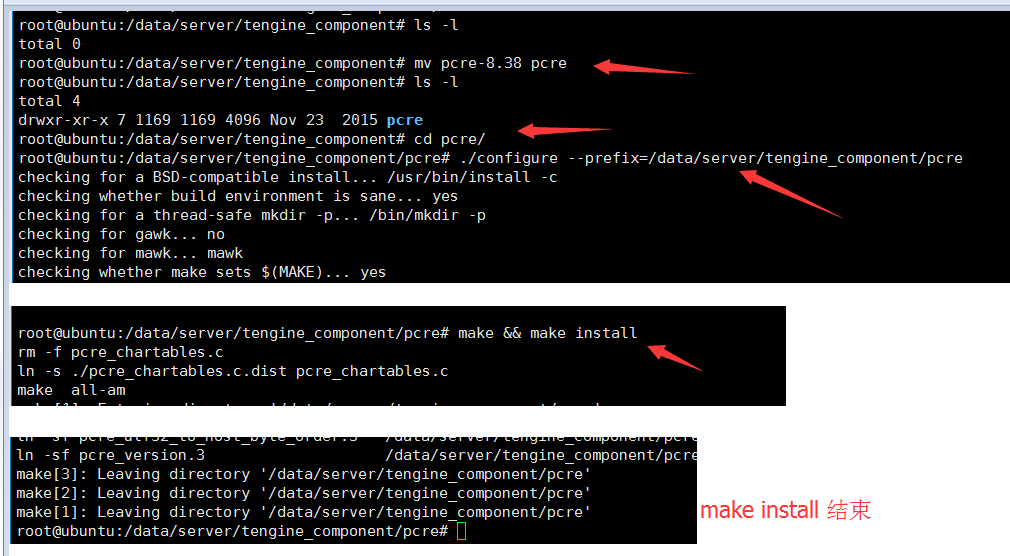
安装所需要的组件【pcre、openssl、zlib】,组件安装的时候注意路径 PCRE 1 2 3 4 5 6 7 wget ftp: //ftp.csx.cam.ac.uk/pub /software/programming /pcre/pcre -8.38 .tar.gz 解压到你指定的目录 tar -zxvf pcre-8.38 .tar.gz -C /data/server/tengine_component mv pcre-8.38 pcre cd pcre/ ./configure --prefix=/data/server /tengine_component/pcre make && make install
OpenSSL 1 2 3 4 5 6 7 wget http: //www.openssl.org/source /openssl-1.0.2.tar.gz 解压到你指定的目录 tar -zxvf openssl-1.0.2.tar.gz -C /data /server/tengine _componentmv openssl-1.0 .2 openssl cd openssl/ ./config --prefix=/data/server /tengine_component/openssl make && make install
这个执行时间稍微长一点
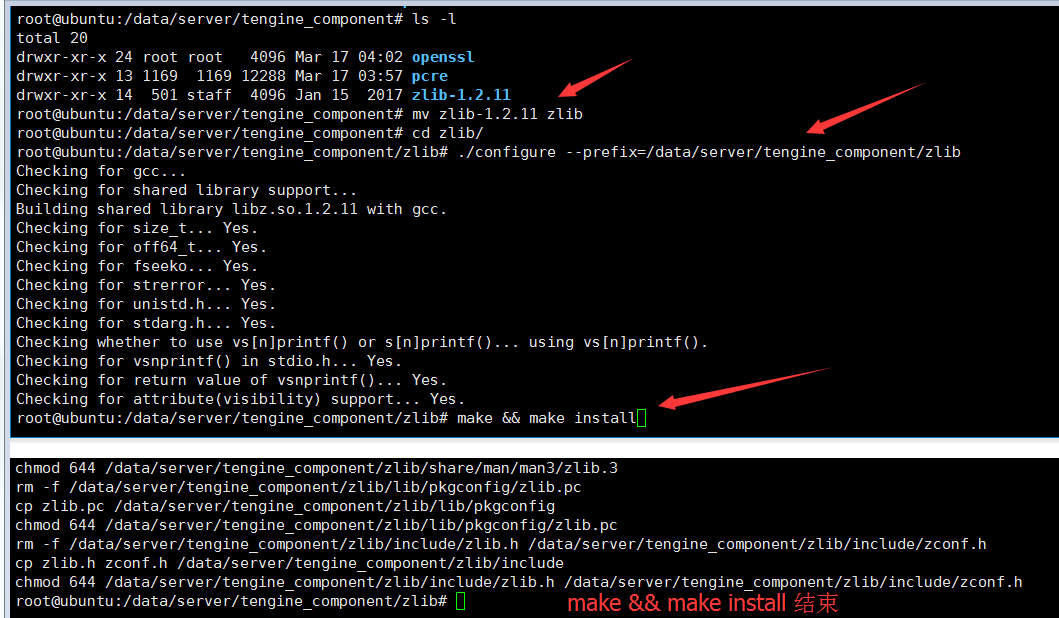
Zlib 1 2 3 4 5 6 7 wget http://zlib .net/zlib -1.2 .11 .tar.gz 解压到你指定的目录 tar -zxvf zlib -1.2 .11 .tar.gz -C /data/server/tengine_component mv zlib -1.2 .11 zlib cd zlib / ./configure --prefix=/data/server/tengine_component/zlib make && make install
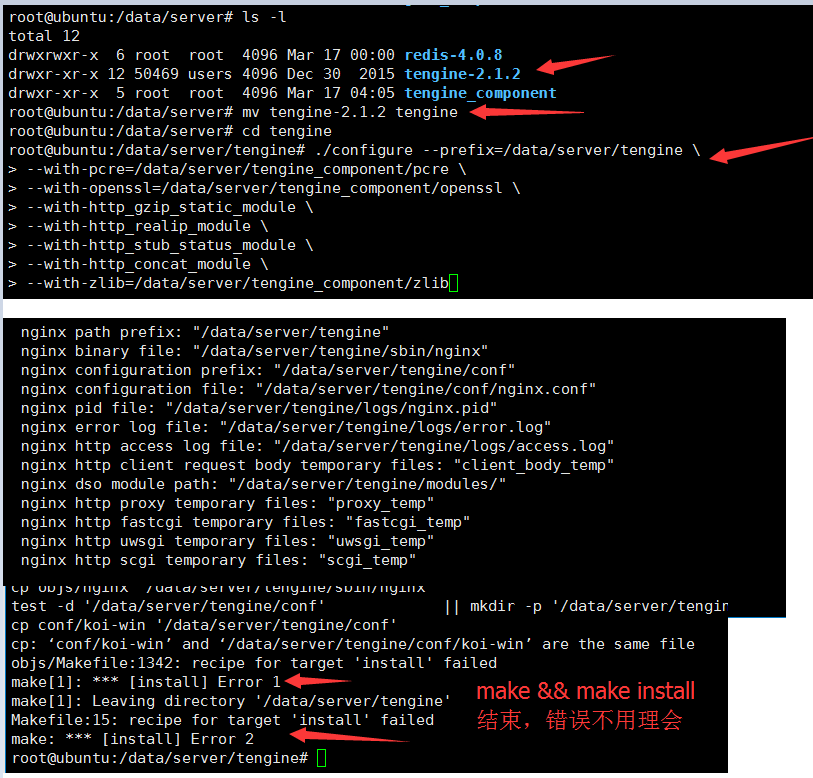
下载 1 2 3 4 5 6 7 8 9 10 11 12 13 14 15 16 17 18 19 20 21 22 groupadd www useradd -s /sbin/nologin -g www www //// //// //// //// //// //// //// //// //// //// //// //// //// //// /// wget http:// tengine.taobao.org/download/tengine-2.1 .2.tar .gz解压到你指定的目录 tar -zxvf tengine-2.1 .2.tar .gz -C /data/server/ mv tengine-2.1 .2 tengine cd tengine ./configure --prefix=/data/server/tengine \ --with -pcre=/data/server/tengine_component/pcre \ --with -openssl=/data/server/tengine_component/openssl \ --with -http_gzip_static_module \ --with -http_realip_module \ --with -http_stub_status_module \ --with -http_concat_module \ --with -zlib=/data/server/tengine_component/zlib make && make install
注意配置的时候 –with-pcre 、–with-openssl、–with-zlib的路径为源文件的路径
检测是否可用 1 2 3 /data/ server/tengine/ sbin/nginx -t没有logs目录,那就创建一个logs目录: mkdir logs
启动关闭命令 1 2 3 4 5 6 7 /data/ server/tengine/ sbin/nginx -t/data/ server/tengine/ sbin/nginx -s start/data/ server/tengine/ sbin/nginx -s stop/data/ server/tengine/ sbin/nginx -s reloadpid出错时,可以使用这个: /data/ server/tengine/ sbin/nginx -c / data/server/ tengine/conf/ nginx.conf
扩展:有时候,我们有好多域名,为了方便我们修改一下 nginx.conf ,修改内容如下,主要是最后一句 include servers/*;然后在nginx.conf 当前位置创建 servers 目录;【修改之前记得把原来的备份 cp nginx.conf nginx.conf_backups 】
1 2 3 4 5 6 7 8 9 10 11 12 13 14 15 16 17 18 19 20 21 22 23 24 25 26 27 28 29 30 31 32 33 34 35 36 37 38 39 40 41 42 43 44 45 46 47 48 49 50 51 52 53 54 55 56 # user nobody; worker_processes 1; # error_log logs/error.log; # error_log logs/error.log notice; # error_log logs/error.log info; # pid logs/nginx.pid; events { worker_connections 1024; } # load modules compiled as Dynamic Shared Object (DSO) # # dso { # load ngx_http_fastcgi_module.so; # load ngx_http_rewrite_module.so; # } http { include mime.types; default_type application/octet-stream; charset utf-8; # server_tokens off; # server_names_hash_bucket_size 128; # client_header_buffer_size 32k; # large_client_header_buffers 4 32k; # client_max_body_size 20m; # client_body_buffer_size 128k; client_header_timeout 30m; client_body_timeout 30m; # client_body_temp_path /dev/shm/client_body_temp_path 1 2; send_timeout 30m; #sendfile on; # tcp_nopush on; # tcp_nodelay on; keepalive_timeout 60; # fastcgi_connect_timeout 300; # fastcgi_send_timeout 300; # fastcgi_read_timeout 300; # fastcgi_buffer_size 256k; # fastcgi_buffers 4 256k; # fastcgi_busy_buffers_size 512k; # fastcgi_temp_file_write_size 512k; # fastcgi_temp_path /dev/shm/factcgi_temp_path 1 2; # fastcgi_cache_path /dev/shm/fastcgi_cache levels=1:2 keys_zone=PHPCACHE:1024m inactive=15m; # fastcgi_cache_key "$scheme $request_method $host $request_uri " ; # fastcgi_cache_use_stale error timeout invalid_header http_500; # fastcgi_intercept_errors on; gzip on; gzip_vary on; gzip_min_length 10k; gzip_buffers 4 16k; gzip_http_version 1.0; gzip_comp_level 2; gzip_types text/plain text/css text/xml text/javascript application/x-javascript application/xml application/javascript; gzip_disable "MSIE [1-6]\."; include servers/*; }
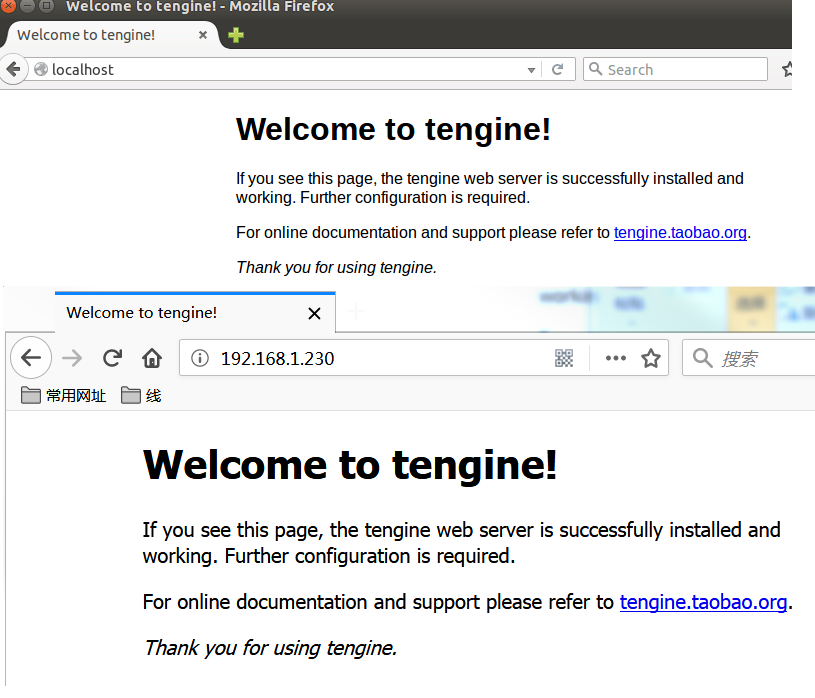
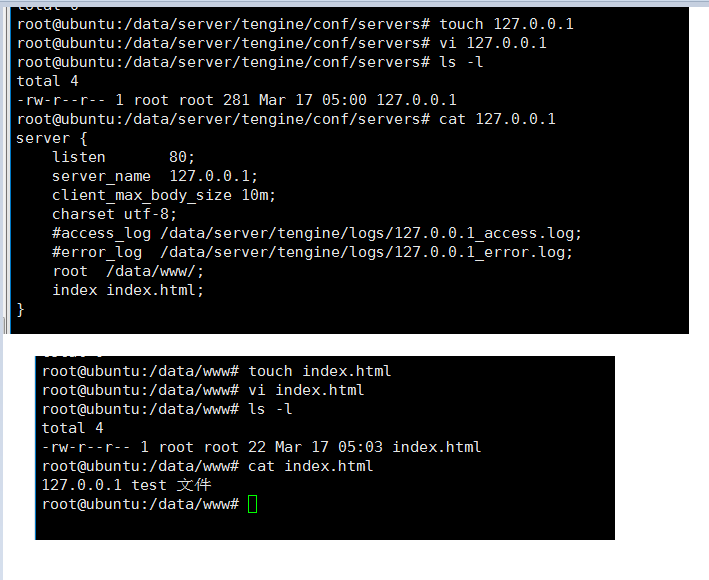
demo 测试,在新建的 servers 目录下创建 文件 127.0.0.1
1 2 3 4 5 6 7 8 9 10 11 12 13 14 15 16 17 18 19 20 21 22 23 24 25 26 27 28 server { listen 80 ; server_name 127.0. 0.1 ; client_max_body_size 0m; charset utf-8 ; #access_log /data /server/tengine/logs/127.0. 0. _access.log ; #error_log /data /server/tengine/logs/127.0. 0. _error.log ; root /data /www/; index index .html; } 或者: server { listen 80 ; server_name 127.0. 0.1 192.168. 1.232 ; client_max_body_size 0m; charset utf-8 ; #access_log /data /server/tengine/logs/127.0. 0. _access.log ; #error_log /data /server/tengine/logs/127.0. 0. _error.log ; root /data /www/; index index .html index .php; location ~ .+\.php($|/) { fastcgi_pass 127.0. 0.1 :9000 ; fastcgi_index index .php; include fastcgi.conf; } }
Tengine 官网安装
